How to Run a YouTube Channel (Checklist)
How to upload videos, which settings you need to know, what to enable and what can bury your channel. A detailed checklist for the content manager.
Here we'll talk about building your favorite channel, the one you'll use for anything: traffic arbitrage, SEO for video content, or just streaming Dota with your drink of choice.
And I'll teach you how to build channels that work as business channels: they're far more pleasant to manage.
If the things described below are hard for you to do, you can always reach out to me. I can set up the workflow for optimizing and properly uploading your videos to the channel, fine-tune the strategy, and help you bring in the right target audience.
It's covered in more detail in my YouTube promotion service.
Creating a Business Channel

How do you check what kind of channel you have — personal or business? What is a personal YouTube account versus a Brand Account? Let's break these concepts down in more detail.
A Brand Account is a special type of account that makes it convenient to promote a brand. If your channel is linked to a Brand Account, you can add other users as owner, manager, or administrator.
It differs from a personal Google account, where this functionality isn't available.
If you see a screen like this, with no option to add administrators, your channel is personal.
And for business you need to create a Brand Account.
To do that, follow this link and create a new channel.
Then enter the name of your channel.
This will be a completely new channel, and it'll need to be set up.
But if you already had an old channel (a personal one) with a pile of videos and you want to move it to a Brand Account (the process can't be reversed), then follow this link.
Then pick the brand channel you want your content from the personal channel to migrate to, including watch history, playlists, and settings.
The rest of the steps and programs we set up following my article.
Let me remind you again what gets lost during the transfer:
- If channel A is your personal channel — here's what you lose during the transfer.
- If channel B is the newly created channel you're transferring to — here's what you lose.
Configuring the Channel
This is configured in the Studio, where you go into the main info and choose "Settings" — the "Channel" section.
Don't forget about the channel's country. By default it should be set to the one where your target audience is located.
Also add channel tags. I wrote about this in detail in the article "Promoting Videos on YouTube."
Next, in the advanced settings, specify once and for all what type of channel yours is. This affects a lot of things.
In the "Advanced Features" section, be sure to complete the following verifications:
- Confirming your phone number unlocks the ability to upload long videos (which rank better), livestreams, and the ability to add your own thumbnails (icons, thumbnails) to your videos!
- For a young channel you can complete video verification to confirm and unlock the ability to add links to any websites in video descriptions, lift limits on the number of videos per day, and gain the right to apply for content monetization.
Next, you need to add a visually distinct "SUBSCRIBE" button.
Yes, you need it. People subscribe through this button.
Open Photoshop and grab the button you like, add your brand color (it should stand out a bit from the cookie-cutter ones and catch the eye).
Don't forget about a transparent background! The icon format is PNG.
As for the profile photo and banner, we already covered that in the article on promoting videos on YouTube.
Then go to the "Studio," choose "Channel customization," Branding, be sure to select "Throughout the entire video," and upload our icon.
In the Branding section, don't forget to upload our logo and, of course, upload the banner. As for how to design a YouTube banner — here's the grid layout:
You need to fit your image into exactly this grid if you want the elements to sit evenly.
You also need to rewrite the description.
Look at how it's displayed right now! The first line is visible to everyone.
So the text needs to be reworked so the user has a reason to click the "MORE" or "Subscribe" button!
So we go to Channel customization, choose Basic info, and write a separate 70-character line (you can measure the length in our Title calculator).
As a result, a line like this will look much cooler and motivate your audience to subscribe to your channel!
Initial Video Upload
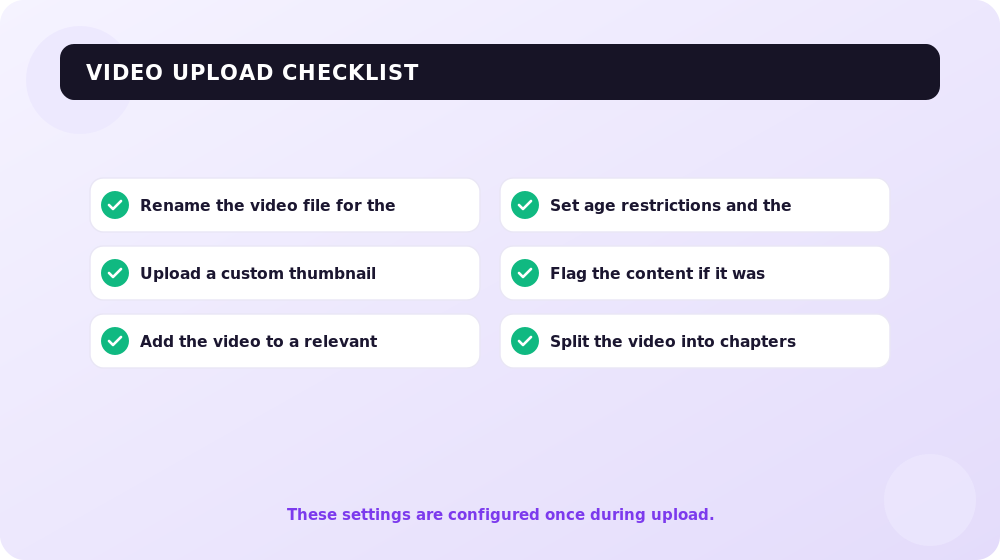
The settings we'll discuss here are done in the second phase and most often just once.
This mistake can outright kill your channel — if you don't set it up exactly as described here — and then a poorly uploaded video might accidentally get published for everyone!
I won't repeat myself about tags and other small stuff; we already covered that in the article on video promotion.
From here on we'll be working with individual videos.
Rename the Video File
As silly as it sounds, you can't rename a video once it's uploaded.
It turns out this affects ranking. So before uploading the file, find it in your browser and press F2 (or open the menu and click "Rename") and name the file the same as the video's title!
Uploading the Video Thumbnail
Thumbnails, icons, miniatures, badges — this term goes by many names. But how to make thumbnails isn't the point; I covered that in a previous article. So where do you upload them? For now they can only be added to regular videos, not Shorts.
The thumbnail field is located right below the video description.
If you have a ready thumbnail, you can upload it. And if you have three, you can choose the testing option and test which one performs best.
The worst choice for you would be creating a thumbnail from a freeze-frame of the video. With that kind of attitude toward your videos, you might as well toss your YouTube channel in the trash.
Choosing a Playlist
Every video should be in its own playlist.
To do this, build a grid of playlists following the same logic you used when collecting keywords for YouTube, and distribute your content across them.
Age Restrictions
Set only the option "No, it's not made for kids" and "Video is suitable for viewers under 18."
With these settings you'll have access to ad configuration.
If you pick "Yes" in the first block, you won't be able to enable comments on the video, and ads will be blocked.
For the second option, the opposite choice allows comments but cuts off access to ads. If your content has a lot of profanity and you don't want ads shown on your videos, you can safely set "Video for viewers 18 and older."
AI Content
This fits the type of content where you build the visuals out of stock footage, AI-generated backdrops, and computer graphics. It's unclear how it works if the computer graphics simulate, say, a star.
The key thing to understand in 2026: YouTube requires you to label realistic synthetic content. If a viewer could mistake generated or altered video for real events — a real person's face swapped by a neural network, a synthesized voice, an imitation of a real scene, or a fake "as if filmed" incident — you're required to turn on the "Altered or synthetic content" toggle. A label then appears under the video stating the content was made with AI, and for sensitive topics (news, elections, health, finance) it shows right on the player.
But decorative and obviously unrealistic AI doesn't need to be labeled: stylized animation, fantasy backdrops, AI upscaling and color correction, idea generation, or a draft script. Don't confuse synthetic-content disclosure with ordinary post-processing. Having the label on its own doesn't lower your reach and doesn't lead to penalties — it's just transparency. But systematically hiding realistic AI content does hurt the channel: YouTube can apply the label for you, and with repeated violations it can limit monetization or take action under community guidelines. So it's simpler to honestly check the box where it's needed.
Chapters
Timestamps are a great thing! And YouTube pulled a fast one on us (well, it tried to help) by adding a magic checkbox to create chapters automatically.
Cool? No!
Always uncheck this box! It does more harm than good.
It's better to just do a proper manual breakdown into chapters.
You don't have to write the word "CONTENTS"; it isn't required. But it's a nod to tradition.
What YouTube does understand is the syntax in the format TIME + SPACE + HEADING TEXT. And so far, only it does.
The finished version looks like this:
0:00 Intro
1:20 Some other heading
2:34:32 Some third heading
- Always make the first line 0:00 for the first chapter and label it "Intro."
- Do the rest of the blocks as a breakdown by chapters.
- Don't make the chapter text too long (around 60 characters max).
A line highlighted in purple won't make it into the chapter list, but it can shorten a chapter heading that's too long.
Here's an example of what happens if your heading is too long. So I moved it to keep the text I needed while making the timestamps look much better.
The new feature is still unknown, I can't say anything about it.
Primary Video Language
Always set it! And it's exactly this that will later affect the choice of subtitles for other languages. You need to do it before uploading the video.
If you do everything right, you won't get "duplicate" languages in the "Subtitles" tab.
Link to the Channel
How do you create a link to your channel? You'd think: well, probably just open it and that's it. Copy the URL and there's your link.
We used to have a scripted YouTube button on the site that we'd add. But it didn't work. So we replaced it with a link.
The reasons a link button is better than a scripted button are obvious:
- Ad blockers, firewalls, and browser plugins can block the button from displaying or working correctly. This button requires fetching a JavaScript file from Google's CDN, which means it won't display, for example, in China, where Google is currently blocked.
- It's hard to control the styling of these buttons, and they can look bad on a mobile device.
- These buttons can cause accessibility problems. A link, on the other hand, is just a link, and it's easy to use with screen readers or other assistive tools.
But okay, a link. We take the channel link and put it right here?
Not so fast!
There's a neat lifehack to do this better!
- First, go into YouTube Studio.
- Click the logo in the corner.
- And copy the string from the browser.
- Your link should look like this:
https://www.youtube.com/channel/UCgxPPiH0izLKgtGRJQo99cg
If another channel opens it, it looks like this:
But now we take and append the following text to our link
?sub_confirmation=1
https://www.youtube.com/channel/UCgxPPiH0izLKgtGRJQo99cg?sub_confirmation=1
And when the channel is opened via a link like this, the user sees the following pop-up!
Here's a detailed guide on how to make a subscribe button on your website.
One caveat — this trick used to work everywhere, but now only on desktops. On mobile devices the trick doesn't work.
License
YouTube's standard license prevents your video from being cited in other videos. But if you're the one on the video, is that really a bad thing? So set the license as shown in the screenshot. This will let your content spread across other channels!
Categories
This item is one of the key ones when uploading a video. And I advise you to clearly define your content's category and set it right here.
Our channel falls into the "Education" category, so we aim precisely for that content. Although the "Howto & Style" format would also suit us.
One nuance here — the "Howto & Style" section is translated specifically as "Hobbies and Style."
According to user opinions, this category includes:
- Lifehacks and tips (Productivity, Time management, Budgeting tips).
- Tutorial videos (Makeup, Hairstyles, DIY fashion, Home decor).
- Style advice (Wardrobe, Seasonal fashion, Styling).
- DIY and craft projects (Room decor, Craft projects, Upcycling).
- Skincare and beauty (Skincare, Cosmetics reviews, Hair makeovers).
- Home organization (Wardrobe organization, Kitchen ideas, Decluttering).
- Health and fitness (Workouts, Healthy recipes, Healthy lifestyle tips).
- Tech and gadgets (Gadget reviews, Tech tutorials, App recommendations).
- Photography and editing (Photography tips, Editing tutorials, Photo gear reviews).
- Travel guides (Destination guides, Travel lifehacks, Packing tips).
Video Release Date
When you create a video, with the initial settings it goes live as unlisted (access via link).
As soon as you've written all the descriptions, subtitles and translations, tags and hashtags (everything we described for the foundation of your video's promotion), you need to go to the "Visibility" section.
In the dialog box we click "Schedule."
Then in the menu set the date and time (how to figure it out — read below), and also choose one of the options:
- If you don't have channel sponsorship, choose option 1.
- If you do have channel sponsorship, choose option 2.
The "Set as premiere" button can attract more views; we use it actively.
How do you figure out when it should go live?
Use the dates when your videos get watched the most as a guide. Once the video is uploaded, go to the "Studio," open the "Analytics" section, choose "Audience," and scroll down to the "When your viewers are on YouTube" section.
Disable Unnecessary Features
On most of your videos certain checkboxes may be set. And you'll think it's great! No, it's junk, just turn them off. It's still proven that their absence has a more positive effect on your videos' ranking than their presence.
And while the first checkbox is sort of applicable for "local bloggers" (though there's no confirmation it's needed), the second one is unlikely to work properly anytime soon.
Full Video for Shorts
If you publish Shorts, remember you can always add a link to the full video. Didn't know that? It's pretty easy!
To do this, go to a published (or not-yet-published) video and choose the "Related video" option.
Then in the interface select a similar video.
Here's the first part for my example video.
Then we click "Save."
In the end it looks like this: on the left is the "Before" frame, on the right is "After."
Conclusion
The list presented in this article is still current as of 2024. It can be used as a content manager's guide when uploading and setting up a channel. In the article I didn't repeat myself about subtitles, tags, descriptions, or quick links — those things are laid down at the script stage and are usually written out in advance by people as a brief in a document.
That's how we usually do it for our clients.
And the points described above are what the channel's content manager needs to know, otherwise they risk burying all the promotion work down to zero.

Link Building in Simple Words: Where to Get Permanent Links and How to Promote a Site with Links in 2026
Link building in simple words from a practitioner since 2008: how permanent links differ from rented links, why the black-hat SEO era is over, white-hat methods with examples, internal linking, AI-assisted link building, and sources.
Read →Google Ads Keywords in 2026: Research, Match Types, Negative Keywords
How Google Ads keywords actually work in 2026: real match type behavior, keyword research, campaign structure, negative keywords and PMax.
Read →Performance Max for an Online Store: A Setup and Optimization Case Study
How to set up Performance Max for an online store: a case study with ROAS growth from 2.8 to 5.1, the Merchant Center feed, asset groups, budget and optimization.
Read →Want to apply this to your site?
We will review the current situation, find the first growth levers, and suggest a practical working format.